
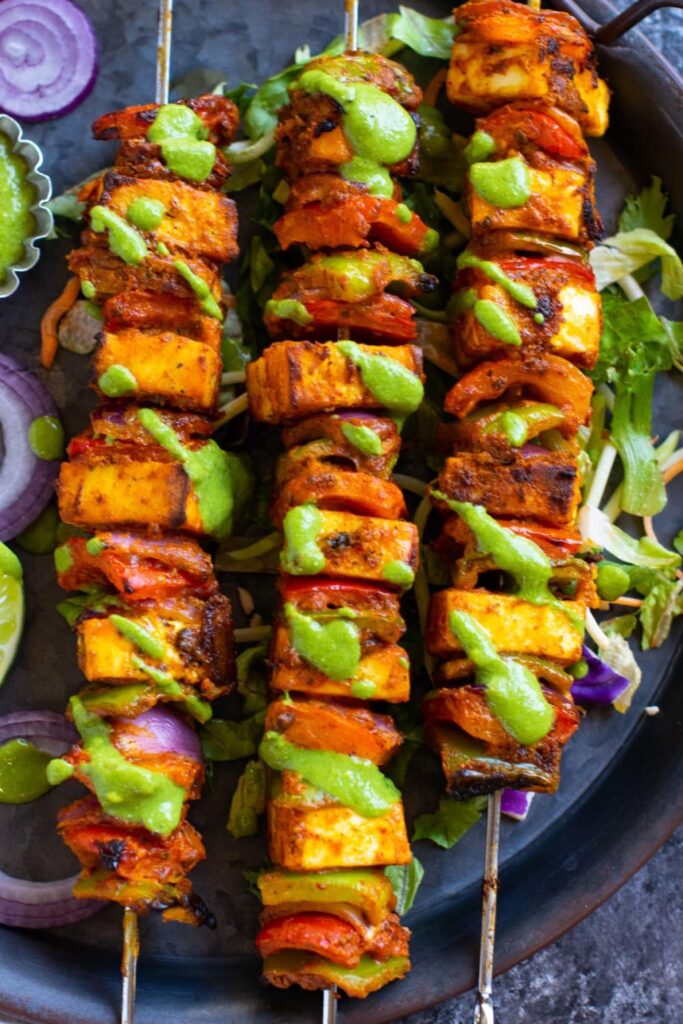
Paneer Tikka is a popular Indian appetizer made from chunks of paneer (Indian cottage cheese) marinated in a spiced yogurt mixture, then grilled to perfection. This vegetarian delight is often served at parties and gatherings, enjoyed for its rich flavors and appealing presentation. Here’s a step-by-step guide on how to make Paneer Tikka at home.
Ingredients
For the Marinade
- 200 grams of paneer, cut into 1-inch cubes
- 1 cup thick yogurt (hung curd)
- 1 tablespoon ginger-garlic paste
- 1 tablespoon lemon juice
- 1 tablespoon gram flour (besan)
- 1 teaspoon turmeric powder
- 1 teaspoon red chili powder
- 1 teaspoon garam masala powder
- 1 teaspoon cumin powder
- 1 teaspoon coriander powder
- 1 teaspoon chaat masala
- Salt to taste
- 1 tablespoon mustard oil (optional)
- 1 tablespoon finely chopped fresh coriander leaves
For Assembling
- 1 green bell pepper, cut into 1-inch pieces
- 1 red bell pepper, cut into 1-inch pieces
- 1 onion, cut into 1-inch pieces
- Wooden or metal skewers
For Garnishing
- Fresh coriander leaves
- Lemon wedges
- Chaat masala
Instructions
Step 1: Preparing the Marinade
- Strain the Yogurt: If the yogurt is not thick, strain it using a muslin cloth or fine sieve to remove excess water. This ensures that the marinade sticks well to the paneer and vegetables.
- Mix the Spices: In a large bowl, add the thick yogurt, ginger-garlic paste, lemon juice, gram flour, turmeric powder, red chili powder, garam masala powder, cumin powder, coriander powder, chaat masala, salt, and mustard oil. Mix well to form a smooth, lump-free marinade.
- Add Coriander: Stir in the finely chopped fresh coriander leaves.
Step 2: Marinating the Paneer and Vegetables
- Prepare the Paneer and Vegetables: Cut the paneer, bell peppers, and onion into 1-inch cubes.
- Marinate: Add the paneer cubes and vegetable pieces to the marinade. Gently mix to coat all pieces evenly. Ensure the paneer and vegetables are well covered with the marinade.
- Rest: Cover the bowl and let it marinate in the refrigerator for at least 1 hour. For best results, marinate for 2-3 hours or even overnight.
Step 3: Assembling the Skewers
- Skewer the Paneer and Vegetables: Pre-soak wooden skewers in water for 30 minutes to prevent burning. Alternate the paneer, bell pepper, and onion pieces on the skewers. Start with a piece of vegetable, followed by paneer, and repeat until the skewer is full, leaving some space at the ends for handling.
Step 4: Cooking the Paneer Tikka
- Preheat the Grill/Oven: Preheat your grill or oven to 200°C (392°F). If using an oven, you can use the broil or grill function.
- Grill the Skewers: Place the skewers on the grill or in the oven on a wire rack with a tray beneath to catch any drippings. Cook for about 15-20 minutes, turning the skewers occasionally to ensure even cooking. The paneer should have a nice char and the vegetables should be tender.
- Optional Stovetop Method: If you don’t have a grill or oven, you can cook the paneer tikka on a stovetop griddle or tawa. Heat some oil on the tawa and place the skewers, cooking on medium heat until the paneer and vegetables get a nice char.
Step 5: Serving the Paneer Tikka
- Garnish: Once cooked, remove the skewers from the grill/oven and let them rest for a minute. Garnish with fresh coriander leaves and a sprinkle of chaat masala.
- Serve: Serve the Paneer Tikka hot with lemon wedges and a side of mint chutney or your favorite dipping sauce.
Tips for Perfect Paneer Tikka
- Quality Paneer: Use fresh, firm paneer to ensure it doesn’t crumble during marination and grilling.
- Thick Marinade: Ensure the marinade is thick so that it adheres well to the paneer and vegetables.
- Even Cooking: Turn the skewers occasionally for even cooking and a uniform char.
- Resting: Allowing the marinated paneer and vegetables to rest helps in absorbing flavors better.
Enjoy this delicious Paneer Tikka as a starter or even as a side dish. It’s sure to be a hit at your next gathering!

The creator behind this blog, and I’m thrilled to share my passion for vegetarian cooking with you.
Cooking has always been a joyful journey for me, filled with vibrant flavors, wholesome ingredients, and the creativity that comes with crafting delicious meals.
Growing up in a family where food was at the heart of every celebration, I learned the art of cooking from my mother and grandmother. Their recipes, steeped in tradition and love, inspired me to explore and experiment in the kitchen. Over the years, I’ve developed my own unique style, blending traditional and contemporary flavors to create vegetarian dishes that are both nutritious and delightful.